Hooks
These hooks offer different way to interact with the Vev Editor.
useIntersection
Tracks the portion of an element that intersects with the visible area of the screen (the viewport).
const el_intersection: false | IntersectionObserverEntry = useIntersection(ref: React.RefObject, options?: IObserverOptions);
Interface
interface IntersectionObserverEntry {
    /**
     * Properties of the tracked reference element
     */
    boundingClientRect: DOMRectReadOnly;
    /**
     * Visible amount of the tracked reference element
     */
    intersectionRatio: number;
    /**
     * Properties of only the visible portion of the tracked reference element (a subset of `boundingClientRect`)
     */
    intersectionRect: DOMRectReadOnly;
    isIntersecting: boolean;
    rootBounds: DOMRectReadOnly | null;
    target: Element;
    time: number;
}

interface IObserverOptions {
    /**
     * Number of times the hook updates as the tracked element enters the visible screen. Defaults to 1.
     */
    steps?: number;
    /**
     * Decimal values indicating the intersection percentage at which the hook updates.
     */
    threshold?: number[];
}
It is not possible to define both a step and a threshold. Define one at most.
Example
Display the percentage of a widget that intersects with the viewport. Update this value 10 times over the course of the widget’s entrance into the viewport.
import { useRef } from 'react';
import { useIntersection } from '@vev/react';

export default function () {
    const widgetReference = useRef(null);
    const intersection = useIntersection(widgetReference, { steps: 10 });

    return (
        <div className="fill" ref={widgetReference}>
            <h1>{intersection.intersectionRatio * 100}</h1>
        </div>
    );
}
useDevice
Vev projects can be custom-designed for various presentation modes such as desktop, tablet, or mobile. useDevice()
returns the currently active mode ('desktop' | 'tablet' | 'mobile').
Usage
const device: string = useDevice();
Example
import { useDevice } from '@vev/react';

export default function () {
    const device: 'desktop' | 'tablet' | 'mobile' = useDevice();

    return <h1>Device: {device}</h1>;
}
useEditorState
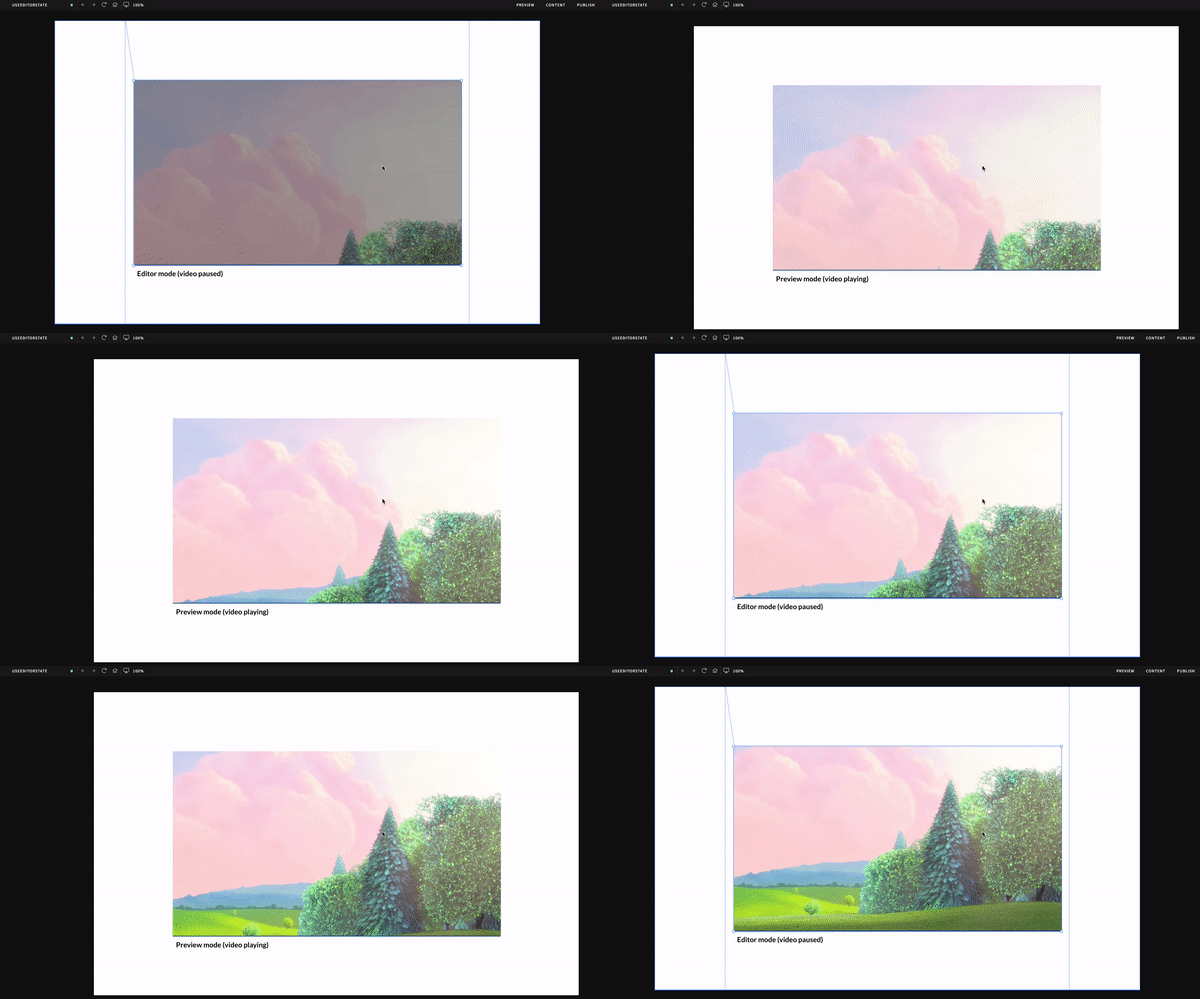
For better widget usability, consider changing the state of your widget depending on which mode the user is in. For example, play a video when in preview mode, but stop it when in editor mode. Or, if the user is changing the background color of a hidden dropdown in your widget, reveal that dropdown when its background colour property is being changed.
useEditorState() returns the following:
disabled: boolean- true when in editor mode, false when in preview mode.rule: string- tells which CSS rule the user is editing. Sets to ‘host’ when no rule is being edited .selected: boolean- true when the widget is selected in editor mode.
Example
import { useEditorState } from '@vev/react';
import { useState, useEffect, useRef } from 'react';

export default function ({ url }: Props) {
    const { disabled } = useEditorState();
    const videoReference = useRef<HTMLVideoElement>(null);

    // this function runs on every value change of 'disabled'
    useEffect(() => {
        // If disabled, pause video
        if (disabled) {
            videoReference.current.pause();
        } else {
            videoReference.current.play();
        }
    }, [disabled]);

    return <video className="video fill" src={url} ref={videoReference} />;
}

useFrame
Triggers a callback function every animation frame. Optionally pass a time parameter in your callback function to
track callback start time. useFrame() calls are paused when running in background tabs.
In the past, setTimeout and setInterval were commonly used to iterate a block of code for animations. Using these
causes the browser to paint frames quicker than most screen refresh rates of 60 FPS. This results in skipped frames and
unnecessary computation, making snappy animations. useFrame() executes the passed call back function more efficiently by
eliminating unnecessary repaints and bundling multiple animations into a single repaint cycle.
Usage
useFrame(callback: (time?: number), deps?: readonly any[]): () => void;
Example
Sliding an element to the right by 500px.
import { useFrame } from '@vev/react';

export default function () {
    let startTime = null;

    useFrame((time) => {
        if (!startTime) startTime = time;
        const progress = time - startTime;
        const boxElement = document.getElementById('SomeElementYouWantToAnimate');
        if (progress < 5000) {
            boxElement.style.left = progress / 10 + 'px';
        }
    });

    return (
        <div className="fill">
            <div id="SomeElementYouWantToAnimate" style={{ left: 0 }} />
        </div>
    );
}

useIcon
Watches and returns information about an icon given its icon key. The icon key can be created/found in the widget’s manifest file.
For SVG icons the following information is returned:
width- the width of the SVG viewboxheight- the height of the SVG viewboxpath- the SVG path to render the icon
Usage
const iconInfo: [ number, number, string | string[] ] = useIcon( iconKey: string );
Example
Render an icon
import { useIcon } from '@vev/react';

export default function () {
    const [width, height, ...path] = useIcon('smiley-icon');

    return (
        <svg viewBox={`0 0 ${width} ${height}`}>
            {path.map((d, index) => (
                <path key={index} d={d} />
            ))}
        </svg>
    );
}
useImage
Watches and returns information about an image.
Usage
const imageData: ImageModel = useImage(imageKey: string);
Interfaces
interface ImageModel {
    meta?: {
        description?: string;
        alt?: string;
        photographer: string;
        width?: number;
        height?: number;
    };
    src: string;
    srcset: [string, number][];
    key: string;
}
useInterval
Run code at specified time intervals. Code will continue to run after every interval lapse until interval is cleared or window is closed.
Example
import { useInterval } from '@vev/react';
import { useState } from 'react';

export default function () {
    const [count, setCount] = useState<number>(0);
    // Increase counter every second
    useInterval(() => setCount(count + 1), 1000);

    return <h1>{count}</h1>;
}

useMenu
In the editor, the designer can build custom menus. To use these menus in a widget, use the useMenu hook.
Usage
const menuChildren: IMenu = useMenu(menuKey?: string);
//if no menu key is defined, the primary menu will be used.
Interfaces
interface IMenu {
    title: string;
    children: IMenuItem[];
}

interface IMenuItem {
    key: string;
    title: string;
    link: IPageLink | IPhoneLink | IEmailLink | IExternalLink | IWidgetLink;
    children?: IMenuItem[];
}
Example
Create a simple menu.
import { Link, registerVevComponent, useMenu } from '@vev/react';

type Props = {
    menuselect: string;
};

const MenuExample = ({ menuselect }: Props) => {
    const menu = useMenu(menuselect);

    if (!menu) {
        return <p>No menu items</p>;
    }

    return (
        <div>
            <h1>{menu.title}</h1>
            {menu.children.map((child) => {
                return (
                    <div>
                        <Link to={child.link}>{child.title}</Link>
                    </div>
                );
            })}
        </div>
    );
};

registerVevComponent(MenuExample, {
    name: 'MenuExample',
    props: [
        {
            name: 'menuselect',
            type: 'select',
            options: {
                display: 'autocomplete',
                items: (context: any) => {
                    if (context.menus) {
                        return Object.keys(context.menus).map((menuKey) => {
                            return {
                                label: context.menus[menuKey].title,
                                value: context.menus[menuKey].key,
                            };
                        });
                    }
                    return [];
                },
            },
        },
    ],
});

export default MenuExample;
useModel
Watches and returns the content model using the widget key. Content model refers to the intrinsic properties of the widget like element ID, classname, icon’s, and form-field values.
Usage
const widgetModel: IContent = useModel(key? string);
// empty key parameter returns the model of the widget you are currently coding.
IContent type interface
interface IContent {
    /**
     * Widget's element ID
     */
    key: string;
    /**
     * Widget's classname
     */
    type?: string;
    style?: {}; // doesn't even work
    /**
     * Contents of the widget's formfield
     */
    content?: {};
    /**
     * Classname
     */
    cl?: string;
    pin?: boolean; // doesn't even work
    html?: boolean; // DONT DOCUMENT
    /**
     * Wcons set on the widget
     */
    icons?: { [key: string]: IShape };
    actions?: string[];
    children?: string[];
}
Example
Observe another widget’s form-field value.
import { useModel } from '@vev/react';

export default function ({ trackedWidget }: Props) {
    const usemodel = useModel(trackedWidget.key);

    return <h1>{usemodel.content.text}</h1>;
}

useRoute
Watches and returns information about the current page route.
Usage
const { pageKey, path } = useRoute();
useScrollTop
Track how much the page has scrolled down relative to the top of the view port.
Usage
const scrollTop : number = useScrollTop(asPercentage?:boolean);
Example
import { useScrollTop } from '@vev/react';

export default function () {
    return (
        <div>
            <h1>Scroll Top (pixels): {useScrollTop()}</h1>
            <h1>Scroll Top (percentage): {useScrollTop(true)}</h1>
        </div>
    );
}
useSize
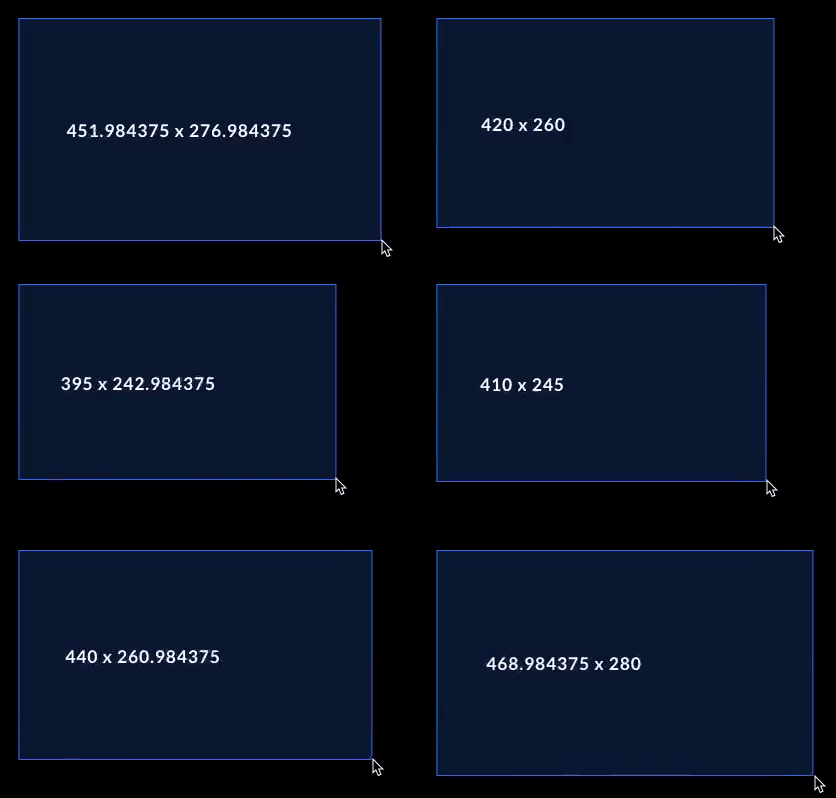
Detect when an element resizes. Returns width and height of the element passed into the hook parameter.
useSize Usage
const useSizeHook: { width: number; height: number } = useSize(React.RefObject);
useSize Example
import { useSize } from '@vev/react';
import { useRef } from 'react';

export default function () {
    const elementReference = useRef<Element>(null);
    const { width, height } = useSize(elementReference);

    return (
        <div ref={elementReference}>
            {width} x {height}
        </div>
    );
}

usePages
Returns all the projects pages and the root directory of published project.
Usage
const [pages, rootDir] = usePages();
Example
import { usePages } from '@vev/react';

export default function() {
  const [pages, rootDir] = usePages();

  return (
    <div>
      <p>Root dir: {rootDir}</p>

      <p>Page titles: {pages.map(page => page.title).join(',')}</p>
    < /div>
  );
};
useViewport
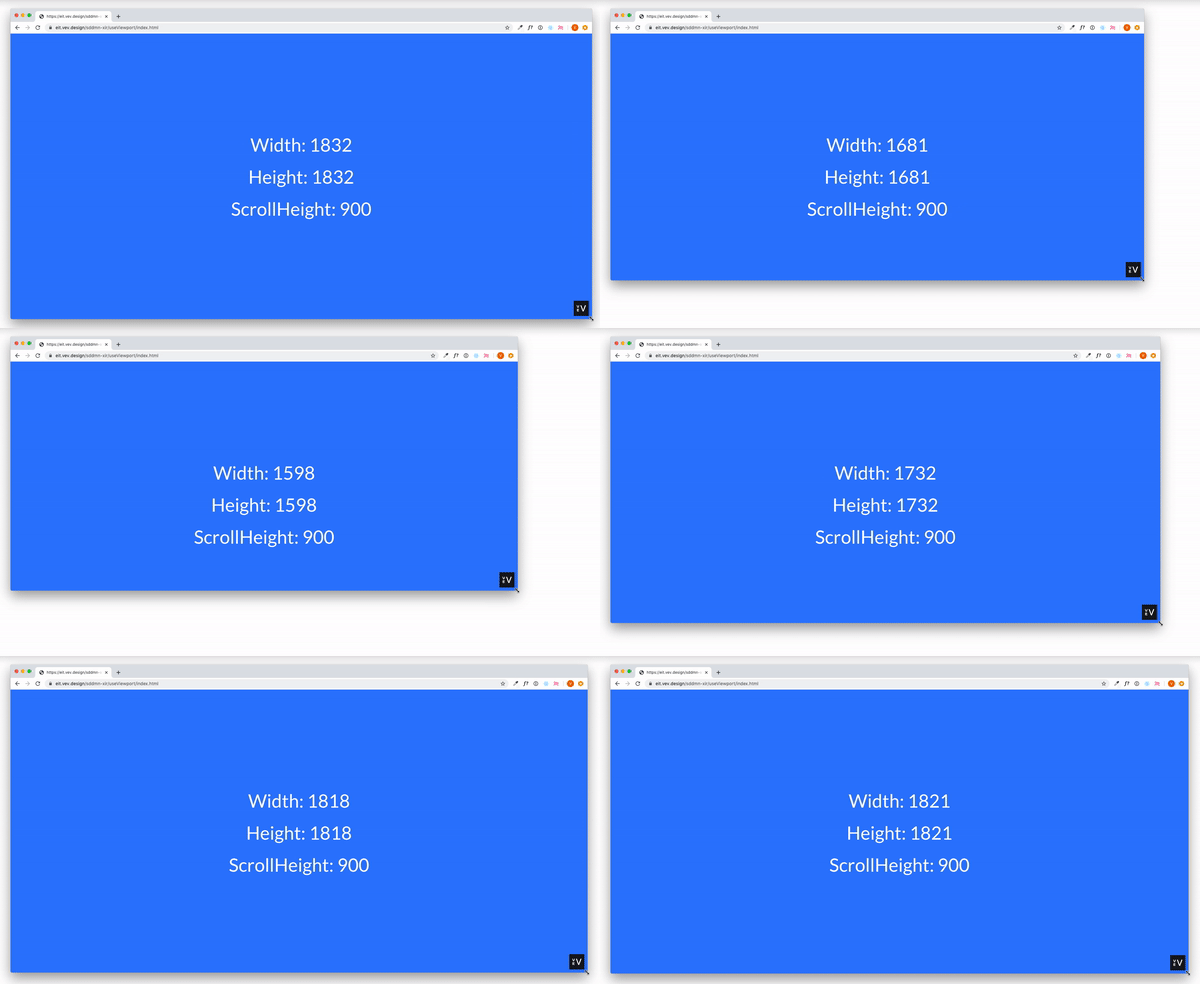
Watches and returns the viewport width, height, and scrollHeight. The viewport is the user's visible area of a
webpage and can vary based on device sizes.
Usage
const { width, height, scrollHeight } = useViewport();
Example
import { useViewport } from '@vev/react';

export default function ({ text }: Props) {
    const [count, setCount] = useState<number>(0);
    const viewport = useViewport();
    const { disabled } = useEditorState();

    function test() {
        console.log('viewport:', viewport);
    }

    return (
        <div className="fill wrapper" onClick={test}>
            <h1>Width: {viewport.width}</h1>
            <h1>Height: {viewport.width}</h1>
            <h1>ScrollHeight: {viewport.scrollHeight}</h1>
        </div>
    );
}

useVisible
Detect if an element is visible in the viewport.
Usage
const isVisible: boolean = useVisible(ref: React.RefObject, object?: IVisibleOptions);
IVisibleOptions Interface
interface IVisibleOptions {
    offSetTop?: number | string;
    offSetBottom?: number | string;
}
Example
import { useVisible } from '@vev/react';

export function VisibleTest() {
    const elementReference = useRef<HTMLDivElement>(null);
    const visible = useVisible(elementReference);

    return <div ref={elementReference} className="fill" />;
}
useVevEvent
Use Vev events dispatched from Interactions.
To use this hook, remember to also add interactions to registerVevComponent.
Usage
useVevEvent(string, () => {});
Example
import { useVevEvent } from '@vev/react';

const YouTube = () => {
    const playerRef = React.useRef();

    useVevEvent('PLAY_VIDEO', () => playerRef.current?.playVideo());

    // ...,

    return <iframe ref={ref} />;
};

registerVevComponent(Youtube, {
    name: 'YouTube',

    // ...,

    interactions: [
        {
            type: 'PLAY_VIDEO',
            description: 'Start playing video',
        },
    ],
});
useDispatchVevEvent
Emits Vev events from your component which can be used to trigger interactions.
Usage
const dispatch = useDispatchVevEvent();
dispatch('EVENT');
Example
import { useDispatchVevEvent } from '@vev/react';

const YouTube = () => {
    const playerRef = React.useRef();
    const dispatch = useDispatchVevEvent();

    React.useEffect(() => {
        // ...

        function onPlayerStateChange(event) {
            switch (event.data) {
                case YT.PlayerState.PLAYING:
                    dispatch('VIDEO_PLAYING');
            }
        }
    }, []);

    // ...

    return <iframe ref={ref} />;
};

registerVevComponent(Youtube, {
    name: 'YouTube',

    // ...

    events: [
        {
            type: 'VIDEO_PLAYING',
            description: 'Video starts playing',
        },
    ],
});
useTracking
Dispatches a vev.track event, that can be used for tracking.
Usage
const track = useTracking(disabled: boolean);
dispatch('MY_EVENT_NAME', {
  customValue: 'value',
})
Example
import { useTracking } from '@vev/react';

const MyComponent = () => {
    const track = useTracking();

    const handler = React.useCallback(() => {
        track('MY_HANDLER_EVENT', {
            data: 'handler-clicked',
        });
        // ...
    }, []);
    // ...
};
useVariable
Watches and returns the variable using the variable key. Use in conjunction with the variable field to get the variable key.
Usage
const variable = useVariable(variableKey);
Example
import { useVariable } from '@vev/react';

const MyComponent = ({ variableKey }: Props) => {
  const variable = useVariable(variableKey);

  return (
    <div>
      <p>Value is: {variable?.value}</p>
    </div>
  );
};
useSetVariable
Dispatch changes to a variable. Use in conjunction with the variable field to get the variable key.
Usage
const setVariable = useSetVariable(variableKey);
setVariable(variableKey, {value: 100, unit: 'px'});
Example
import { useSetVariable } from '@vev/react';

const MyComponent = ({ variableKey }: Props) => {
  const setVariable = useSetVariable();

  return (
    <div>
      <button onClick={() => {
        setVariable(variableKey, {value: 100, unit: 'px'});
      }}/>
    </div>
  );
};